Claude 3 で画像をピクセル化するプログラムを生成
前回「Claude 3 で画像連携のクリエイティブコーディング」という記事で、Three.jsを利用して、画像を粒子にして、拡散するというプログラムを生成しましたが、今回は、同じくClaude 3とThree.jsを利用して異なるコーディングを試してみました。
生成したプログラム
入力した画像をピクセル化するようなプログラムを書いてみました。ピクセルアートに変換するにあたって、ピクセル化の粒度も選べるように調整しています。
実際のコード
<!DOCTYPE html>
<html lang="ja">
<head>
<meta charset="UTF-8">
<title>Image to Pixel Art Animation</title>
<script src="https://cdnjs.cloudflare.com/ajax/libs/three.js/r128/three.min.js"></script>
<style>
body { margin: 0; }
canvas { display: block; }
</style>
</head>
<body>
<script>
// シーンの設定
const scene = new THREE.Scene();
const camera = new THREE.PerspectiveCamera(35, window.innerWidth / window.innerHeight, 0.1, 1000);
camera.position.z = 1;
const renderer = new THREE.WebGLRenderer({ alpha: true });
renderer.setSize(window.innerWidth, window.innerHeight);
renderer.setClearColor(0x000000, 0); // 背景を透明に設定
document.body.appendChild(renderer.domElement);
let mesh;
// 画像のURL配列
const imageUrls = [
'image1.jpg',
'image2.jpg',
'image3.jpg',
'image4.jpg'
];
let currentImageIndex = 0;
// 画像の読み込み
const loader = new THREE.TextureLoader();
let pixelMaterial;
loadImage();
function loadImage() {
loader.load(imageUrls[currentImageIndex], (texture) => {
const aspectRatio = texture.image.width / texture.image.height;
const windowAspectRatio = window.innerWidth / window.innerHeight;
let imageWidth, imageHeight;
if (aspectRatio > windowAspectRatio) {
imageWidth = 1;
imageHeight = 1 / aspectRatio;
} else {
imageWidth = aspectRatio;
imageHeight = 1;
}
const geometry = new THREE.PlaneGeometry(imageWidth, imageHeight);
if (pixelMaterial) {
pixelMaterial.map = texture;
pixelMaterial.needsUpdate = true;
} else {
pixelMaterial = new THREE.MeshBasicMaterial({ map: texture, transparent: true });
mesh = new THREE.Mesh(geometry, pixelMaterial);
scene.add(mesh);
}
// アニメーションの開始
animatePixelation();
});
}
// ピクセル化アニメーション
function animatePixelation() {
let pixelSize = 1;
const maxPixelSize = 3;
const duration = 2000; // アニメーションの時間(ミリ秒)
const startTime = performance.now();
function animate() {
const elapsedTime = performance.now() - startTime;
const progress = Math.min(elapsedTime / duration, 1);
pixelSize = Math.floor(progress * (maxPixelSize - 1)) + 1;
const canvas = document.createElement('canvas');
const ctx = canvas.getContext('2d');
canvas.width = pixelMaterial.map.image.width;
canvas.height = pixelMaterial.map.image.height;
ctx.drawImage(pixelMaterial.map.image, 0, 0);
if (pixelSize > 1) {
const pixelCanvas = document.createElement('canvas');
pixelCanvas.width = canvas.width;
pixelCanvas.height = canvas.height;
const pixelCtx = pixelCanvas.getContext('2d');
pixelCtx.imageSmoothingEnabled = false;
const colorPalette = [
'#000000', '#ffffff', '#ff0000', '#00ff00', '#0000ff',
'#ffff00', '#ff00ff', '#00ffff', '#800000', '#008000',
'#000080', '#808000', '#800080', '#008080', '#808080'
];
for (let y = 0; y < canvas.height; y += pixelSize) {
for (let x = 0; x < canvas.width; x += pixelSize) {
const imageData = ctx.getImageData(x, y, pixelSize, pixelSize);
let totalR = 0, totalG = 0, totalB = 0;
for (let i = 0; i < imageData.data.length; i += 4) {
totalR += imageData.data[i];
totalG += imageData.data[i + 1];
totalB += imageData.data[i + 2];
}
const avgR = totalR / (imageData.data.length / 4);
const avgG = totalG / (imageData.data.length / 4);
const avgB = totalB / (imageData.data.length / 4);
let minDistance = Infinity;
let closestColor = '';
for (const color of colorPalette) {
const [pr, pg, pb] = hexToRGB(color);
const distance = Math.sqrt((avgR - pr) ** 2 + (avgG - pg) ** 2 + (avgB - pb) ** 2);
if (distance < minDistance) {
minDistance = distance;
closestColor = color;
}
}
pixelCtx.fillStyle = closestColor;
pixelCtx.fillRect(x, y, pixelSize, pixelSize);
}
}
pixelMaterial.map.image = pixelCanvas;
} else {
pixelMaterial.map.image = canvas;
}
pixelMaterial.map.needsUpdate = true;
if (progress < 1) {
requestAnimationFrame(animate);
} else {
// 次の画像をロード
currentImageIndex = (currentImageIndex + 1) % imageUrls.length;
setTimeout(loadImage, 1000); // 1秒後に次の画像をロード
}
}
animate();
}
// RGB値に変換する関数
function hexToRGB(hex) {
const r = parseInt(hex.slice(1, 3), 16);
const g = parseInt(hex.slice(3, 5), 16);
const b = parseInt(hex.slice(5, 7), 16);
return [r, g, b];
}
// ウィンドウのリサイズ処理
function onWindowResize() {
camera.aspect = window.innerWidth / window.innerHeight;
camera.updateProjectionMatrix();
renderer.setSize(window.innerWidth, window.innerHeight);
}
// ウィンドウのリサイズイベントリスナー
window.addEventListener('resize', onWindowResize);
// レンダリング
function render() {
requestAnimationFrame(render);
renderer.render(scene, camera);
}
render();
</script>
</body>
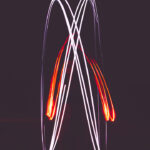
</html>動作デモ
LLMに的確に指示しないと時間がかかる
前回と異なりかなり時間がかかってしまいました。前回はあまり考えずに指示しても形になりましたが、LLMに適した指示の形をうまく形成していかないと、自分で書いたほうが早いということになりがちだと感じました。
指示を体系化して、より高い精度を出せるように調整していきたい。